
Case study · Grainger KeepStock
Storage Unit Builder
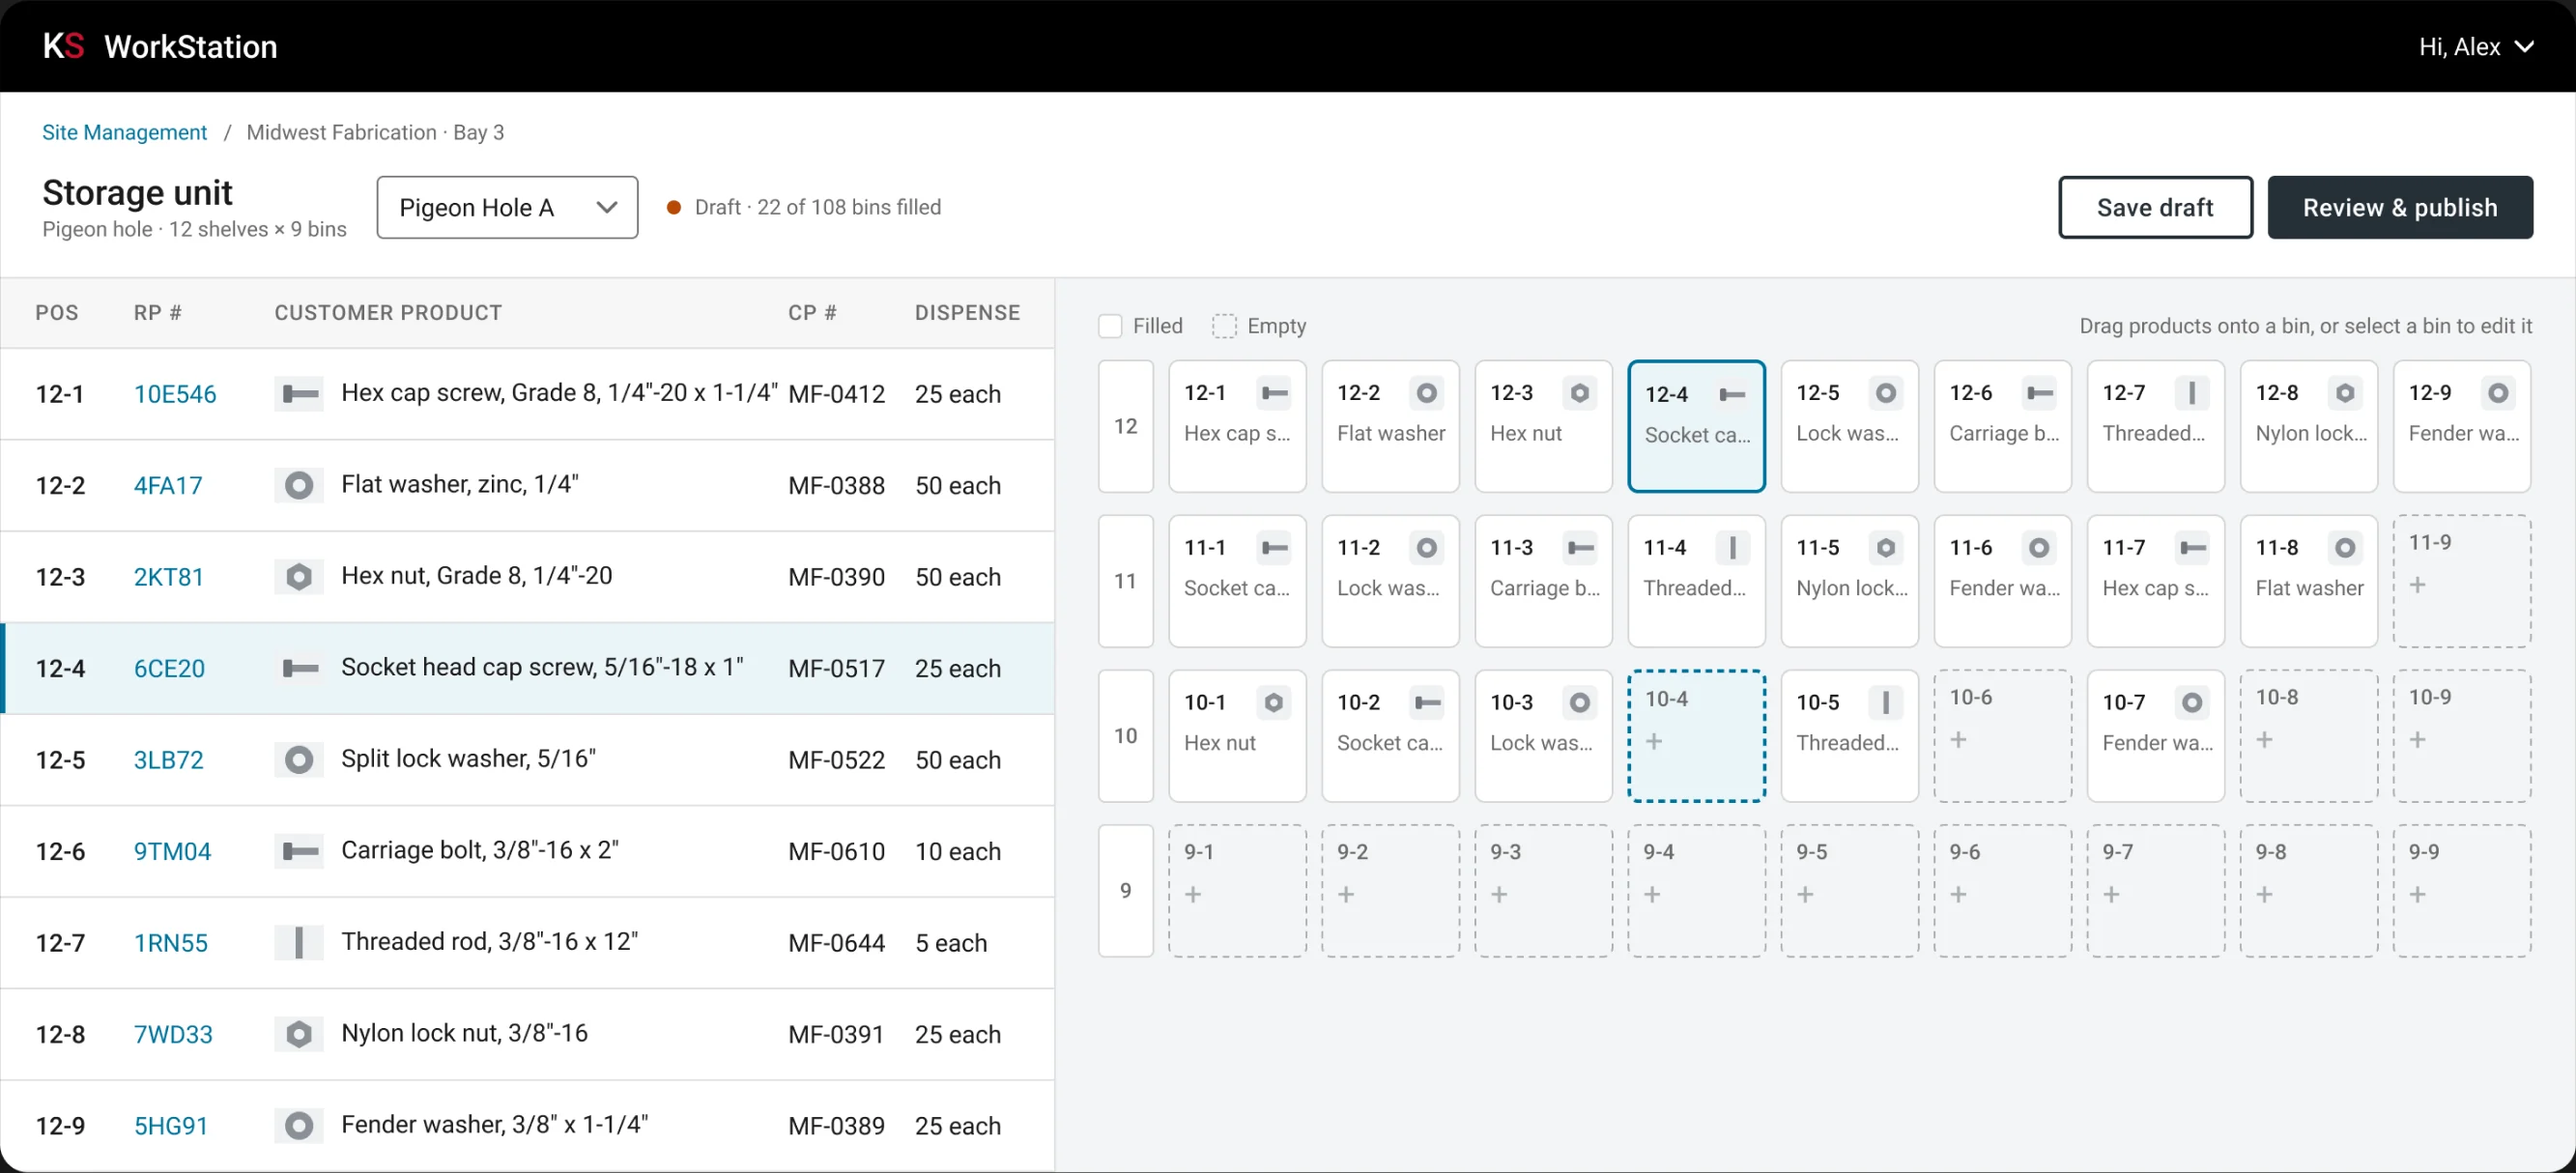
A visual tool for KeepStock reps to build a customer's storage units and slot products into them, replacing spreadsheets.
Context
A physical problem managed in rows and columns
KeepStock reps set up storage at customer sites, from pigeon holes and lockers to vending machines and carousels, and keep those sites current as products change.
There was no tool for it. Every unit, shelf, bin, and product assignment lived in a spreadsheet. I designed the Storage Unit Builder end to end: an internal KS WorkStation tool where a rep builds the unit visually and slots products into it.
Before & after
From a spreadsheet to the unit itself
A storage unit is a physical object: shelves, bins, and the products sitting in them. In a spreadsheet it becomes a long list of positions, so nobody could see the unit they were building.
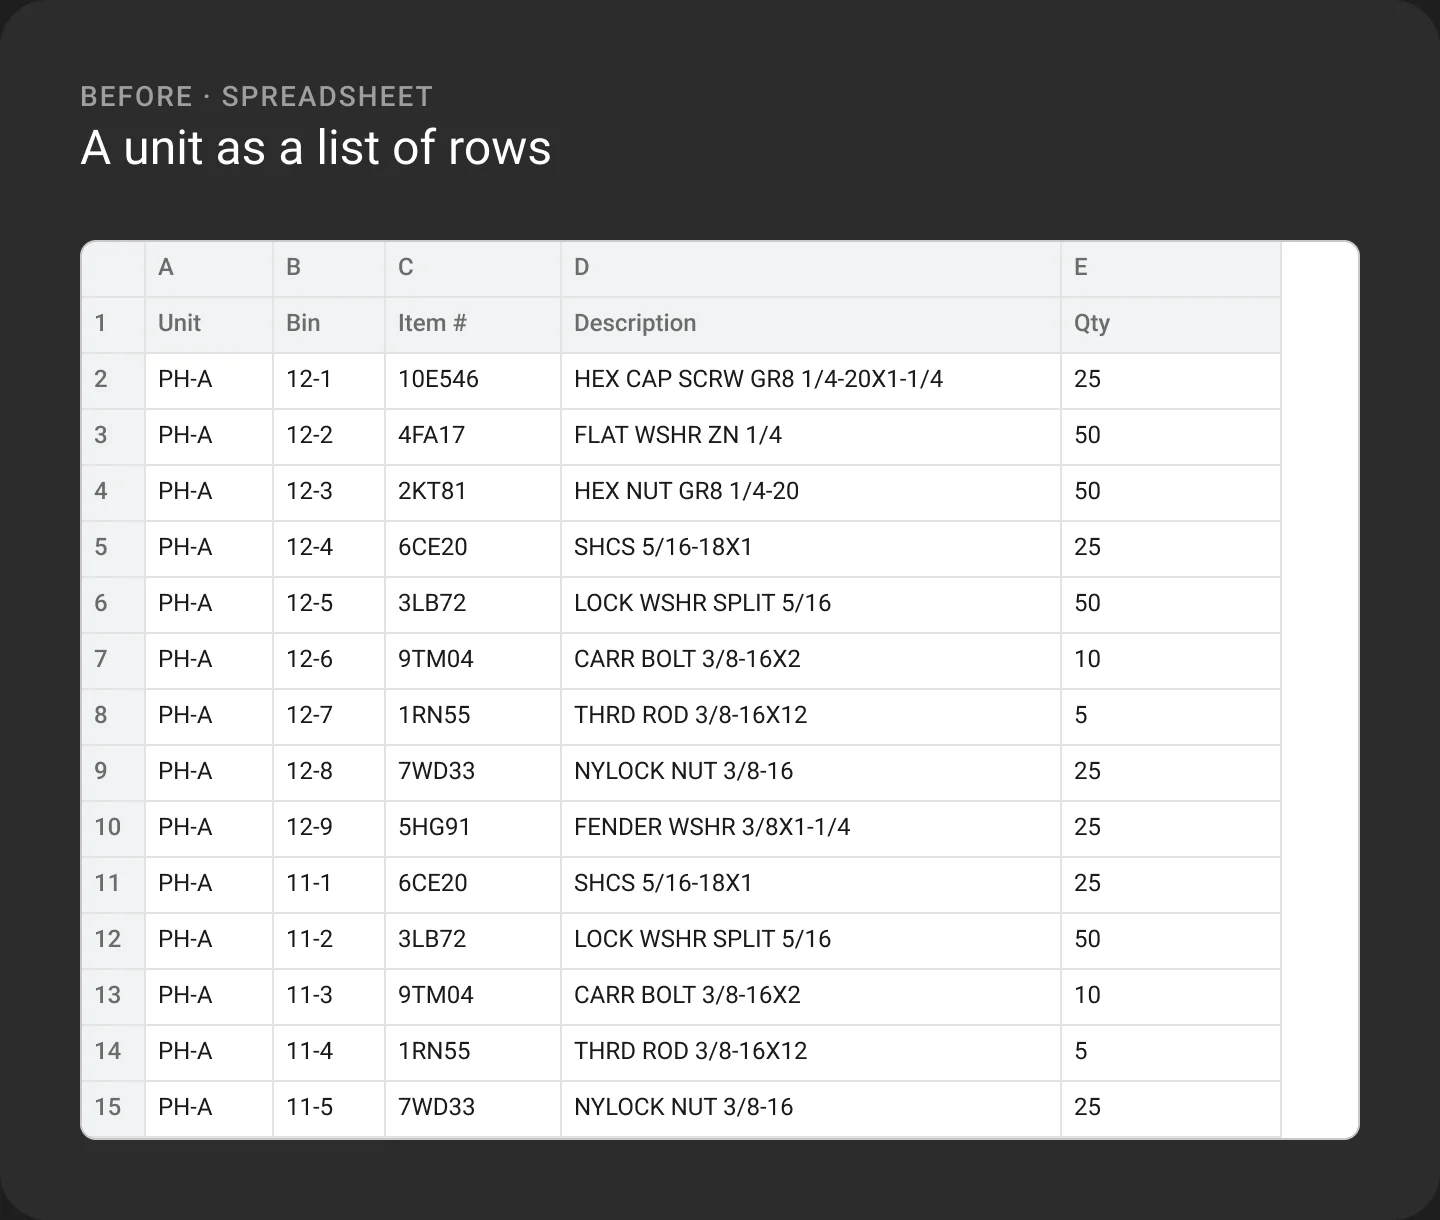
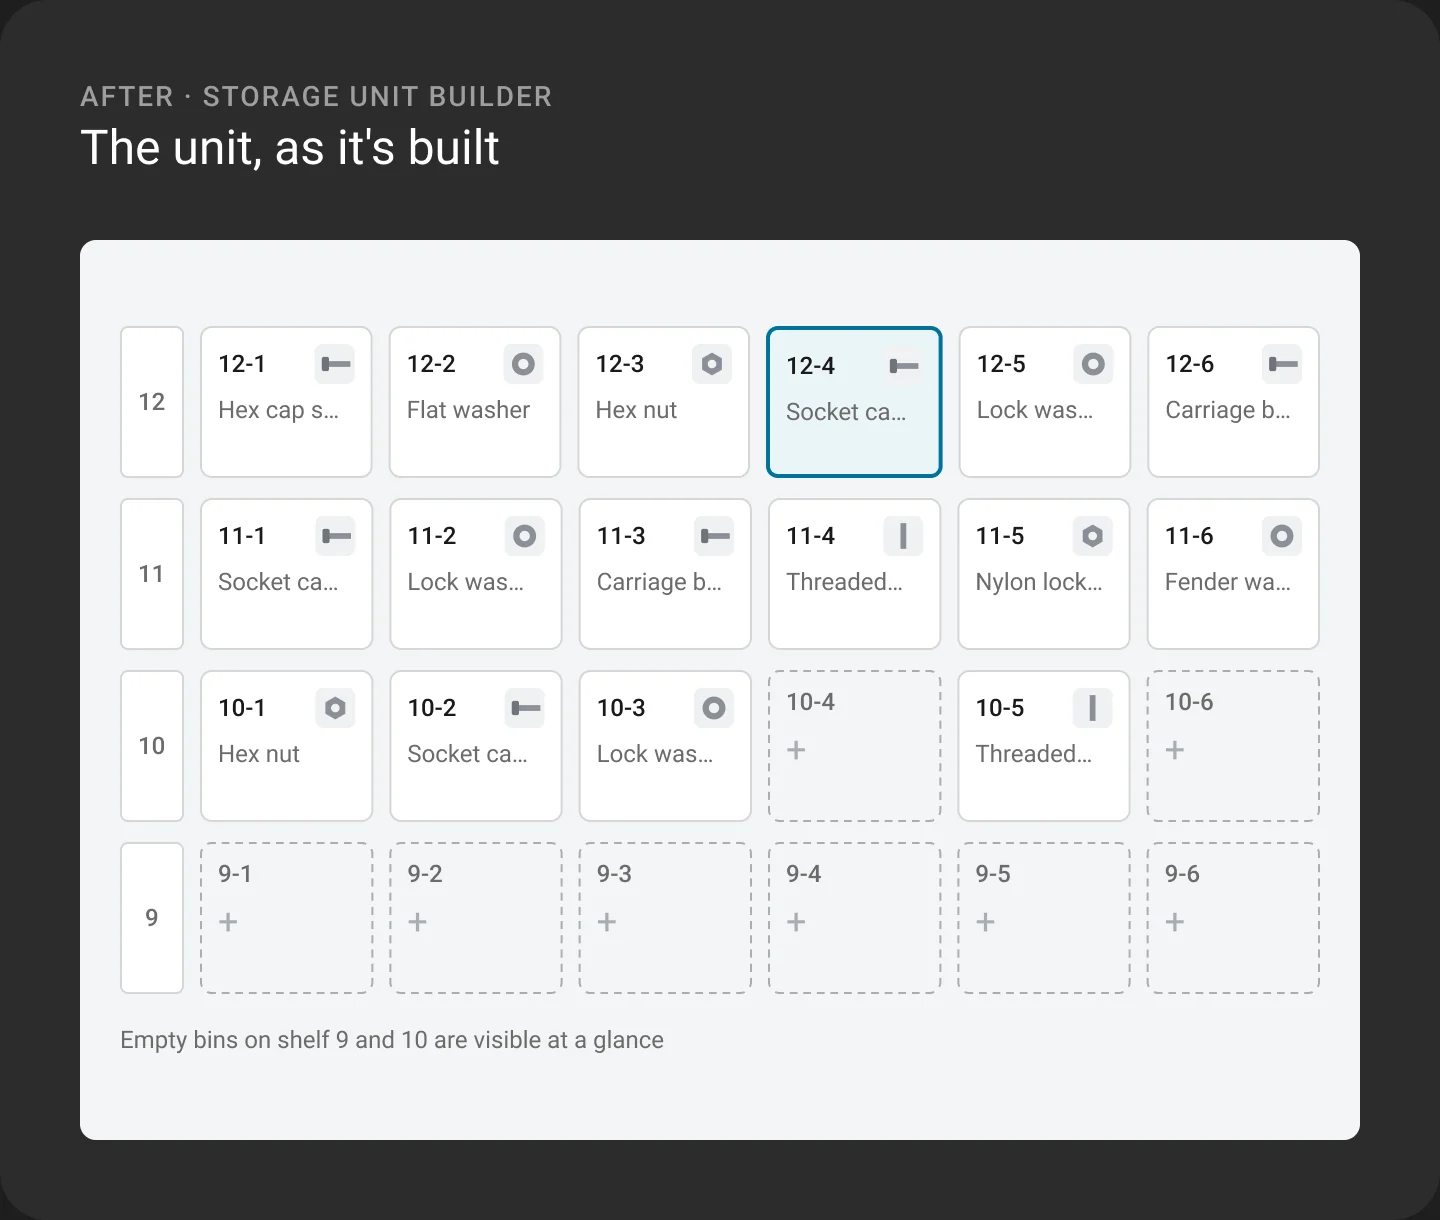
You couldn't see the unit
A list of positions hid the shape of the shelves, so reps had to picture the unit in their heads.
Gaps were easy to miss
Empty or unassigned bins looked like any other row until someone went looking.
Rows and bins drifted apart
Editing a product meant finding the right row and trusting the bin number next to it.
The flow
Five steps from an empty site to a published unit
The same flow handles a brand-new site and a change to an existing one. A rep can stop at any step, save a draft, and pick it back up.
- 01
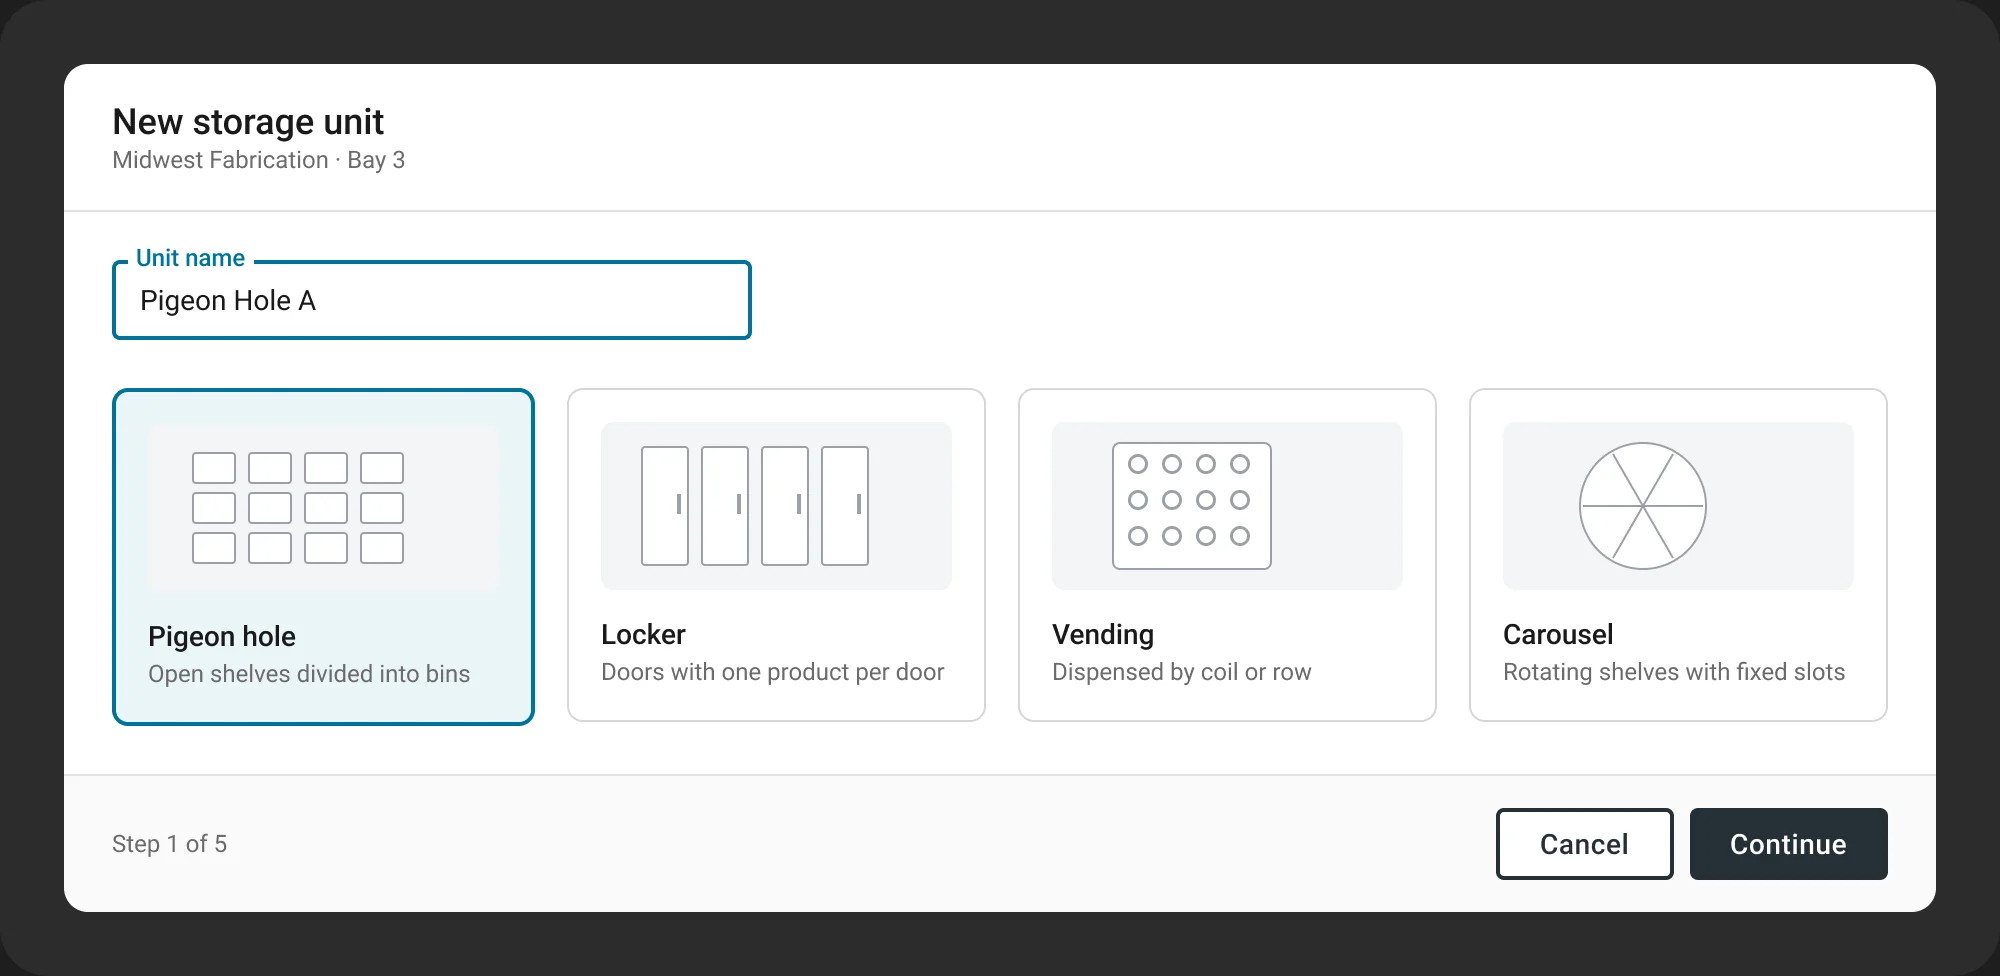
Pick a unit type
Each customer site mixes unit types. Choosing one up front sets the right structure, labels, and defaults for everything that follows.
- 02
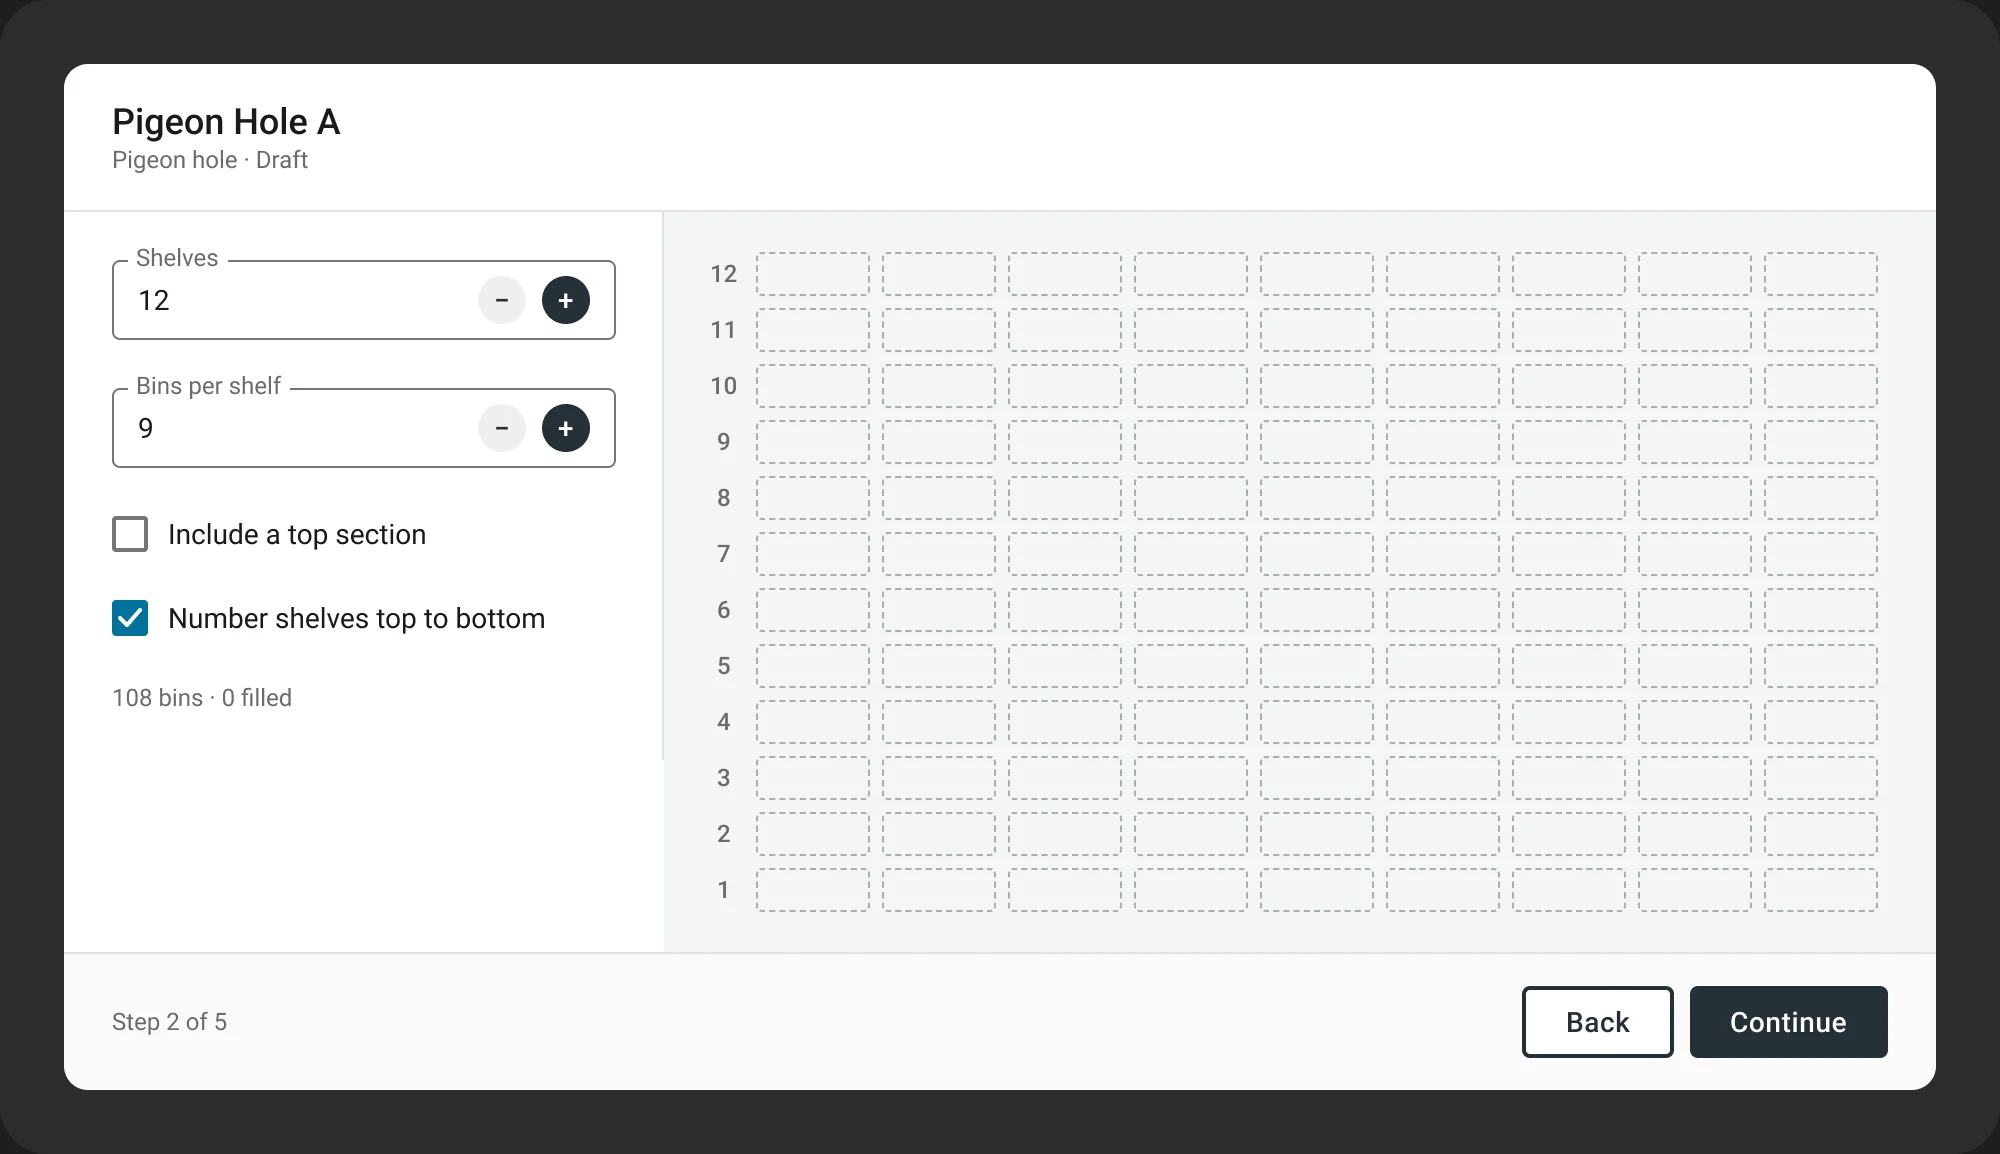
Configure shelves and bins
Reps set the shelf and bin counts to match the real unit, and the preview redraws as they type. Labels follow the physical numbering, so 12-4 on screen is 12-4 on the shelf.
- 03
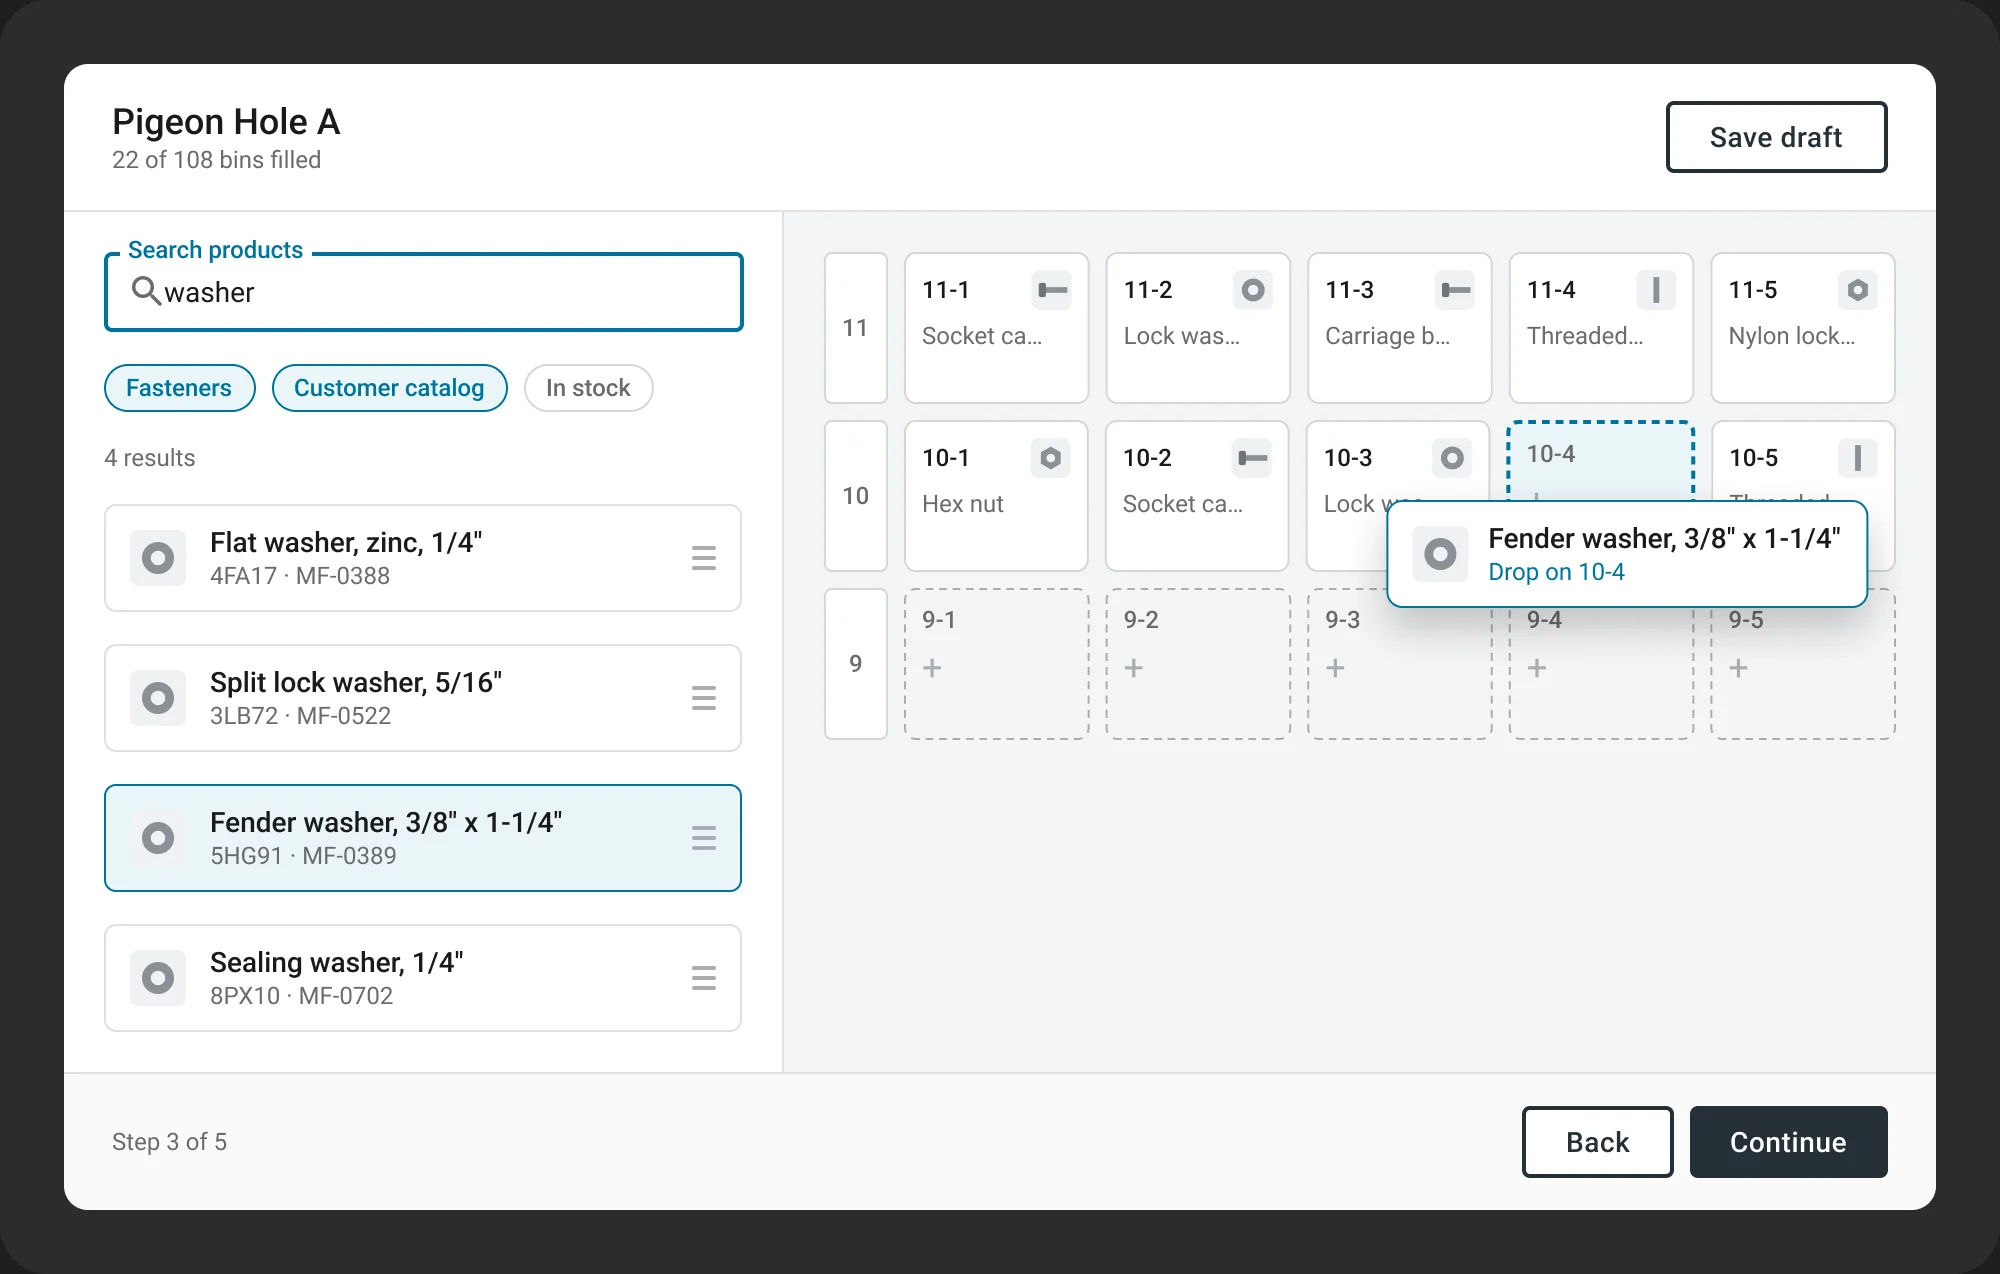
Find products and slot them
A product panel sits beside the unit. Reps search the customer's catalog, then drag a product onto a bin. The bin shows a drop target before they let go.
- 04
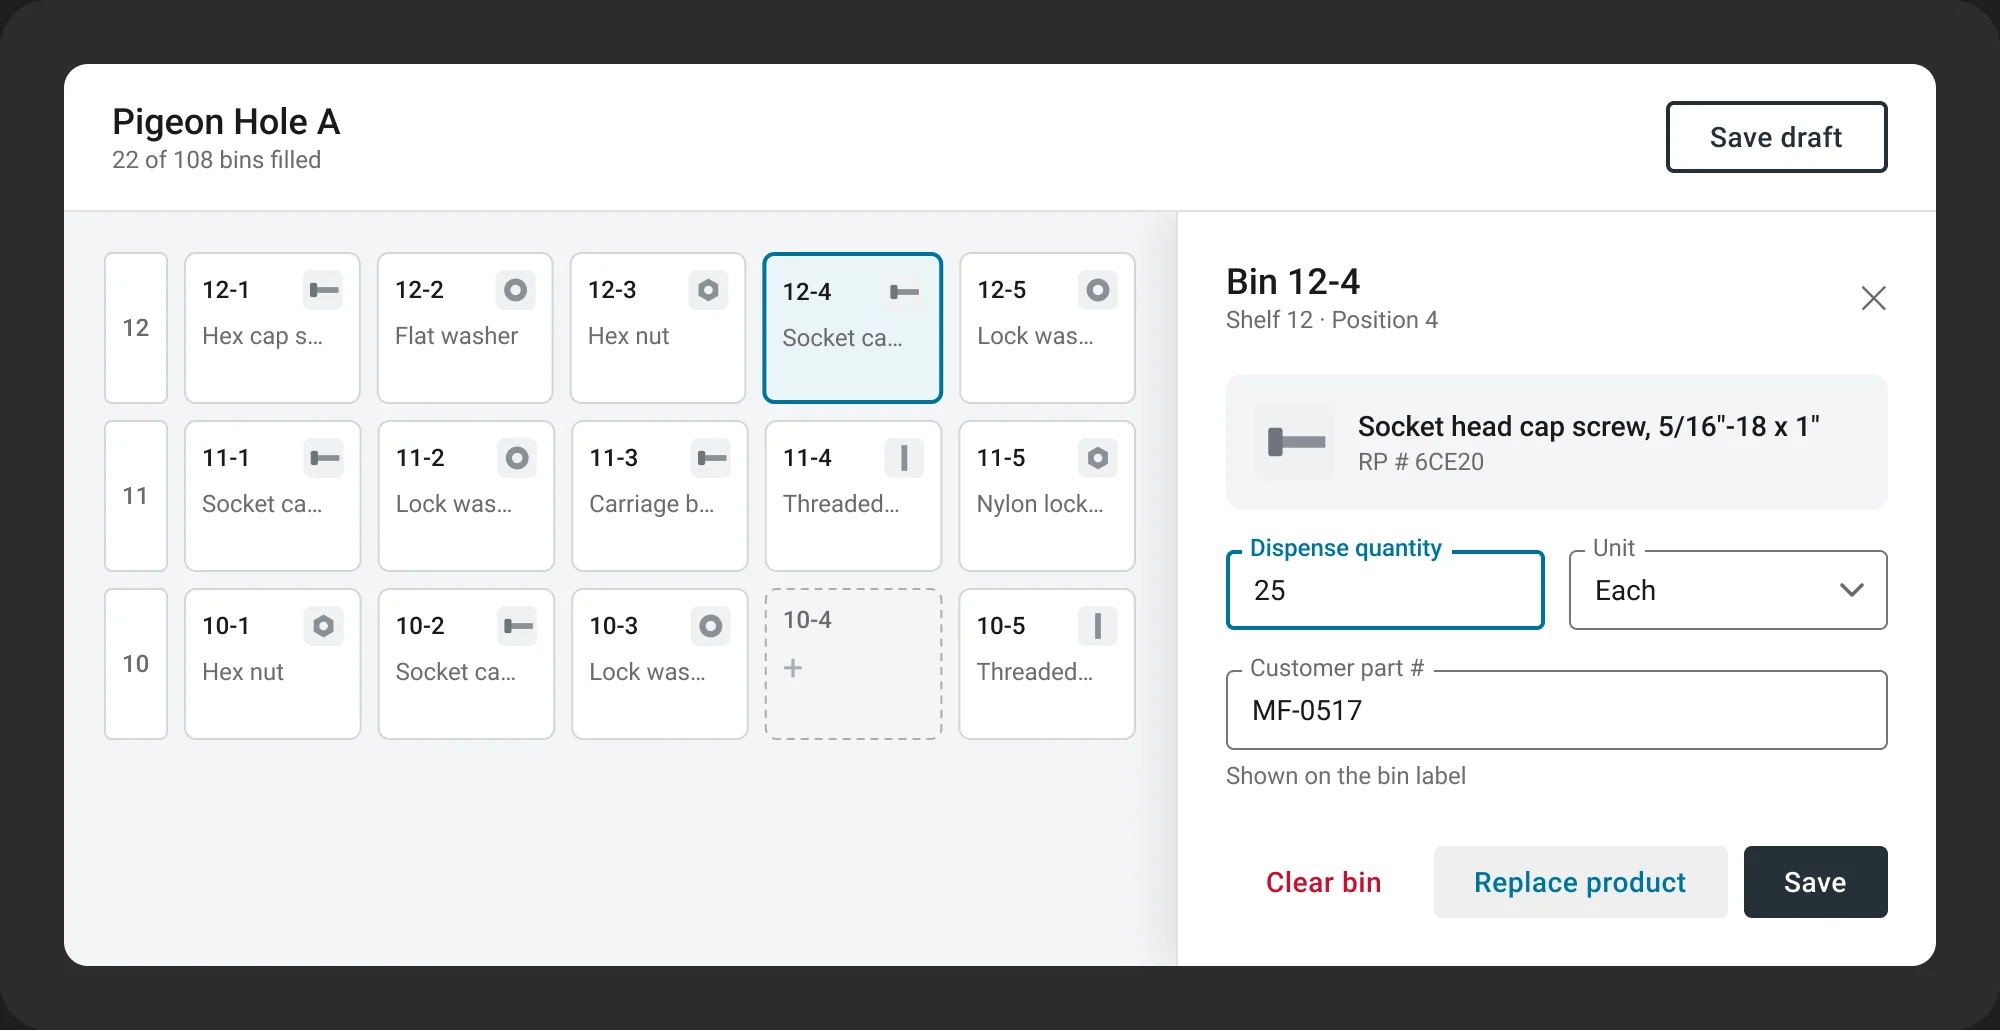
Edit a bin
Selecting a bin, in the unit or the table, opens its details beside the unit. Reps set the dispense quantity, confirm the customer's part number, or swap the product without leaving the layout.
- 05
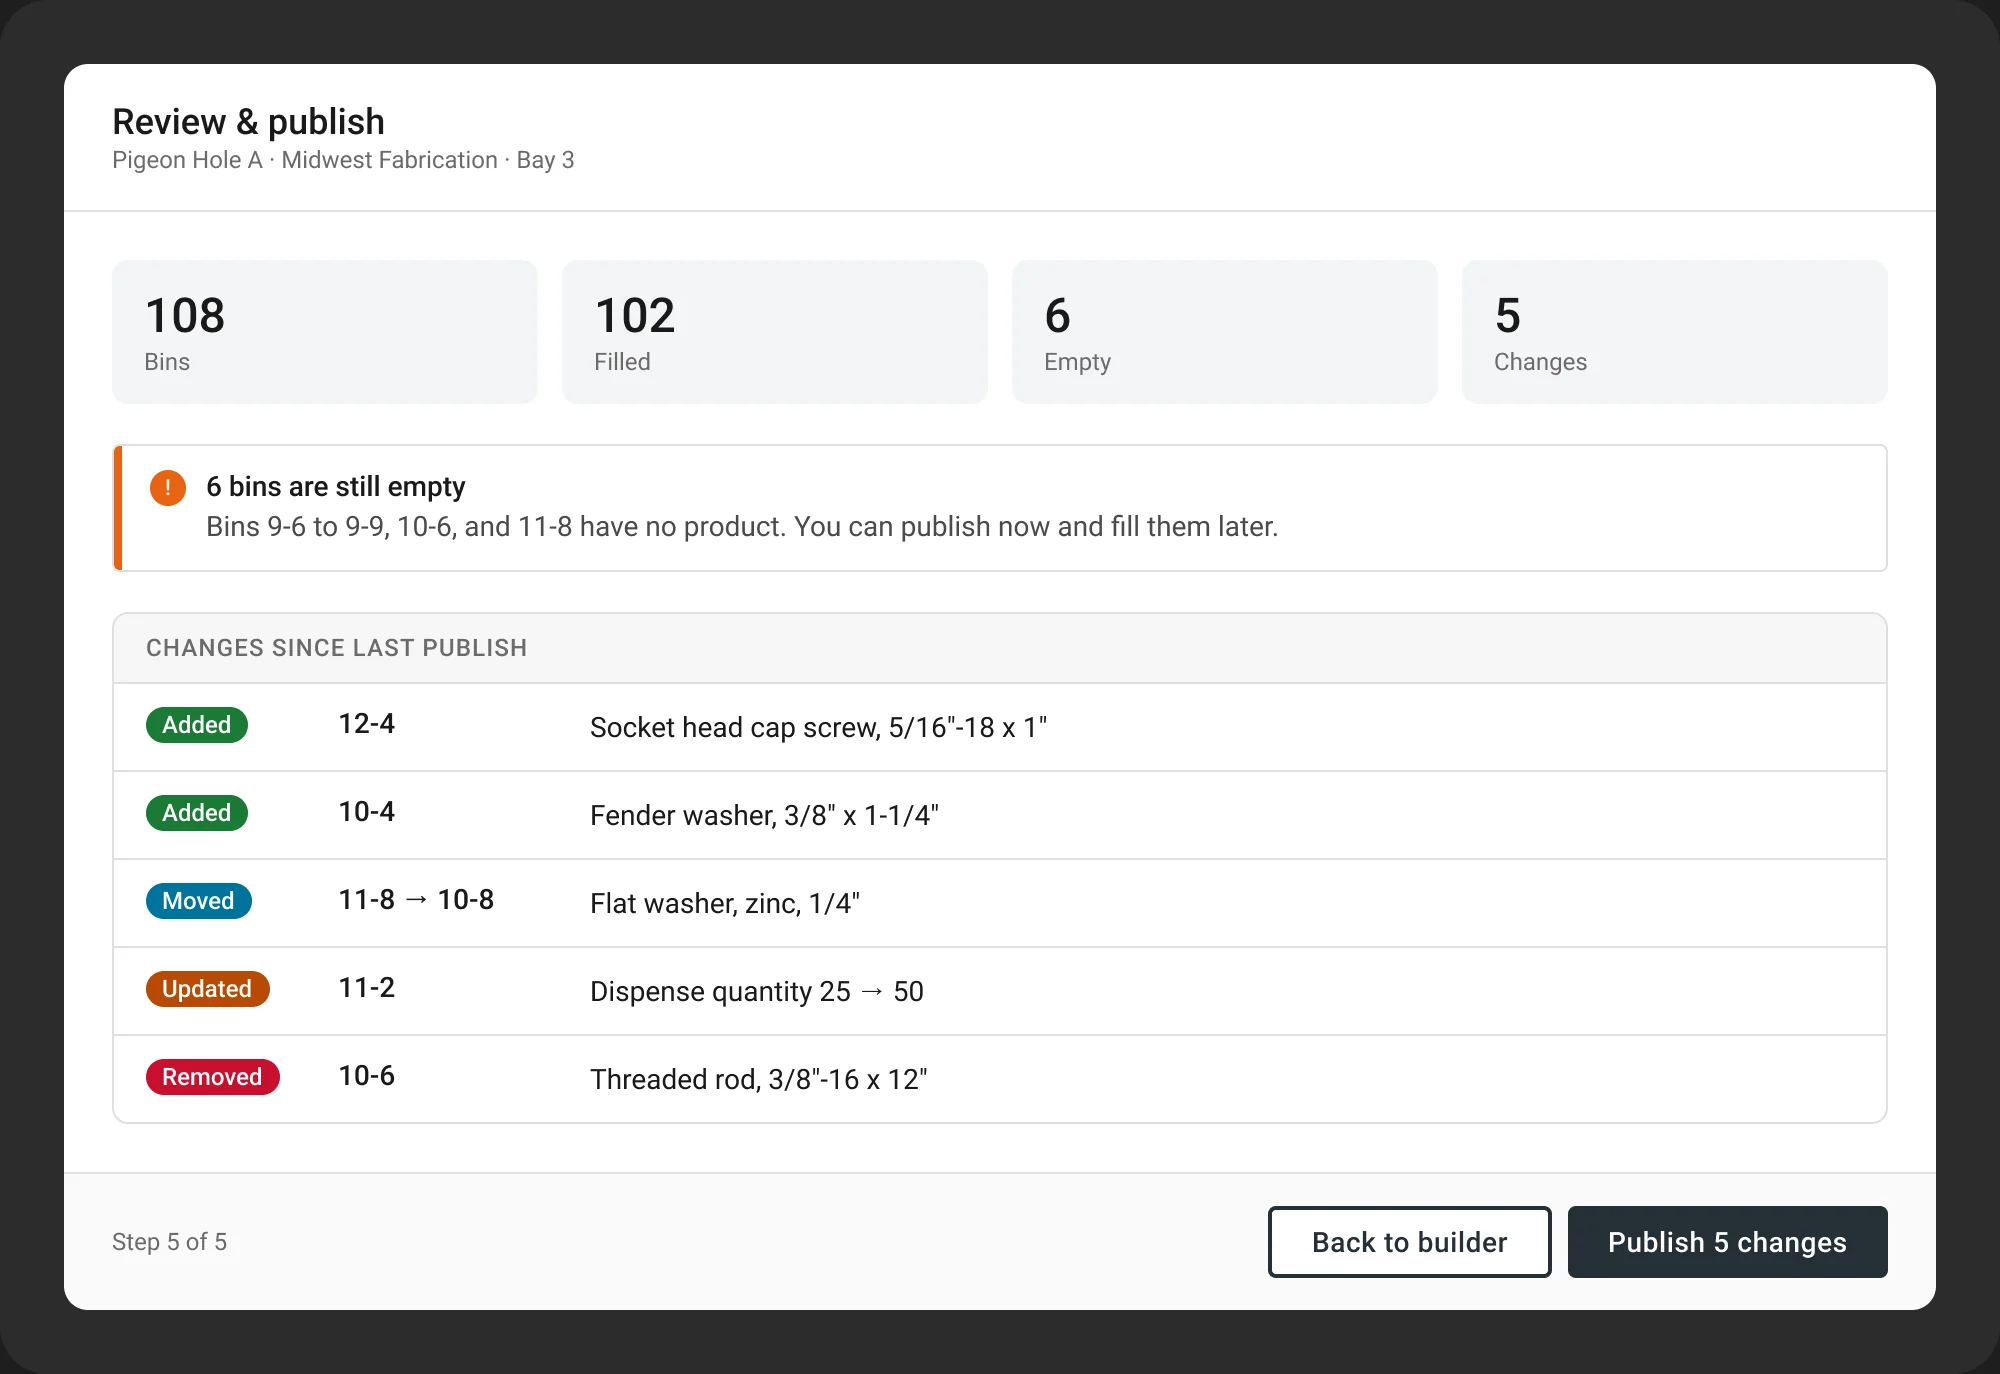
Review changes and publish
Before anything goes live, the rep sees exactly what changed since the last publish: products added, moved, or removed, and quantity updates. That's what makes the same flow work for ongoing changes, not just new sites.
Outcome
Spreadsheets out, one shared picture in
Next case study
AZ Checkout Experience